If glossy French tips and chrome overlays ruled the last few seasons, 2026 is the year of hyper-realistic 3D nail art. This trend has evolved from salon-only designs to something that at-home nail lovers can now experiment with — thanks to easier tools, stronger gels, and endless visual inspiration online.
What makes 3D nail art so captivating is the illusion of a touchable dimension. It’s texture-driven, sculptural, and photogenic — the kind of nail style that instantly pops in every photo or reel.
From delicate crystal accents to sculpted petals that look soft enough to move, this art form blurs the line between manicure and miniature sculpture.
If you’ve ever admired those hyper-realistic textures on Pinterest or TikTok and wondered, How do they make that look so real? — this guide is your starting point.
What Is Hyper-Realistic 3D Nail Art?
At its core, 3D nail art involves adding dimensional elements on top of (or into) your nail design using sculpting gels, acrylic powders, or hard gel.
But hyper-realistic 3D nail art goes a step further — it uses shading, highlights, transparent layering, and micro-detailing to mimic real materials and textures like:
- Dewy flower petals 🌸
- Glossy glass bubbles 💧
- Gemstone crystals 💎
- Velvet matte ribbons 🎀
- Metallic chrome contours ✨
Instead of just being decorative, each texture feels tactile and natural — like something that belongs in real life, not just on a nail tip.
Step-by-Step: How to Create 3D Nail Textures
Let’s break down the core steps of achieving a balanced, hyper-realistic 3D look — the type that looks dimensional without being bulky.
Step 1: Start with a Smooth, Solid Base
Choose a base color that enhances depth.
- Nude, sheer pink, or smoky translucent shades work best for natural-looking designs.
- Cure fully before layering any 3D elements.
Step 2: Map Out Your Design
Visualize where the 3D details will sit — usually on 1–2 accent nails per hand.
Use a thin pencil brush to lightly sketch outlines with a neutral gel polish.
Step 3: Sculpt the 3D Forms
Using your 3D sculpting gel, pick a small bead and apply it to the nail.
- For petals → Flatten with a silicone tool and curve the edges.
- For bubbles → Shape with a dotting tool and cure while still rounded.
- For chrome lines → Use metallic gel and layer it twice to keep the outline crisp.
Cure each layer as you build dimension — this prevents the shape from collapsing.
Step 4: Add Shading and Realism
Here’s where the hyper-realism kicks in:
- Apply sheer gel tints around the 3D shapes to create shadow and contrast.
- Add micro highlights with white gel or reflective topcoat.
- For crystal or water effects, top only certain sections with a high-shine dome of clear gel.
Think of it as painting light onto your sculpture — the key to fooling the eye into seeing depth.
Step 5: Seal and Balance
After curing your final layer, seal with a clear topcoat or use matte selectively to balance textures.
Too much gloss flattens dimension; a combination of glossy + matte areas looks more natural and refined.
7 Design Ideas to Try (Beginner-Friendly)
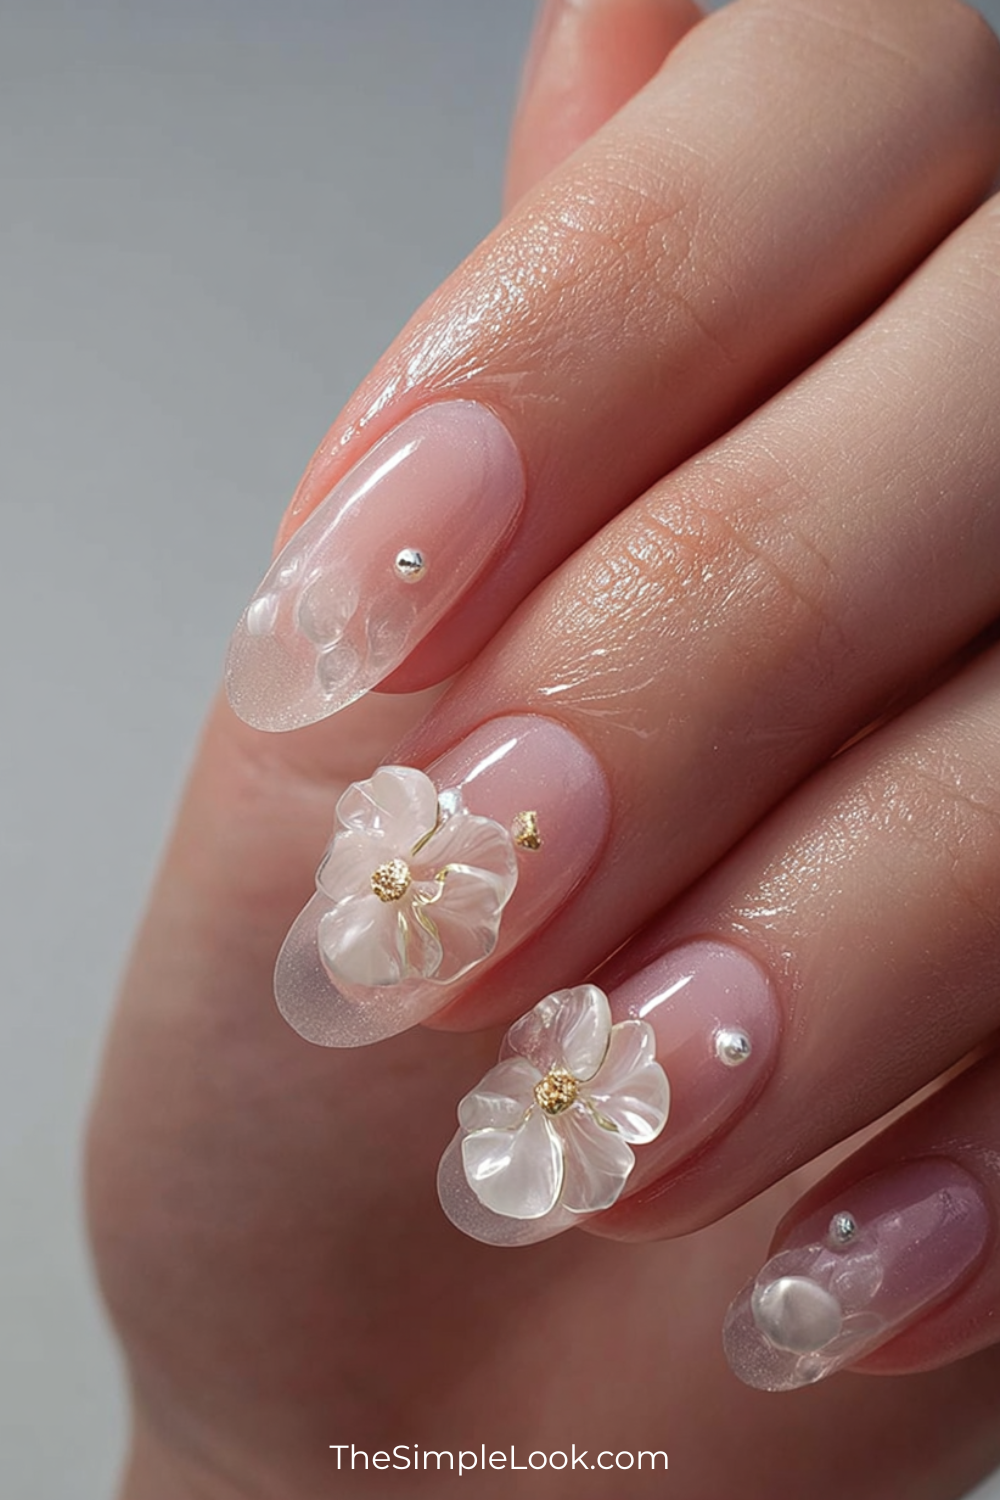
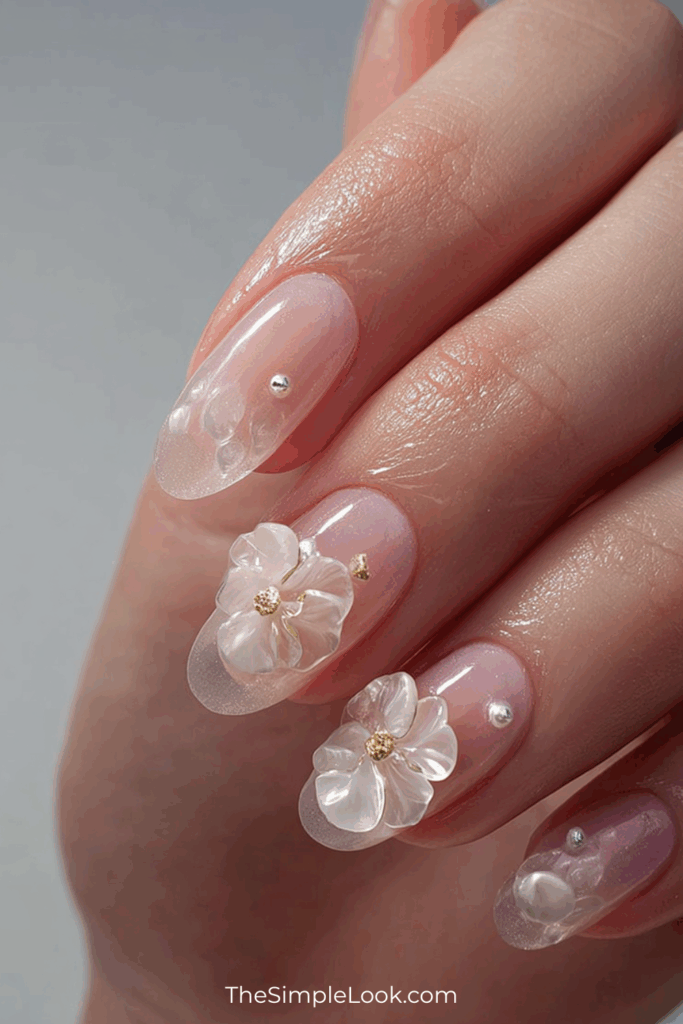
1. Glass Blossom Nails
A translucent nude base with sculpted petals made from clear gel. Add tiny dew drops near the cuticle for realism.
Texture Focus: Soft bloom transparency + water shine.
2. Iridescent Pearl Drip
Sculpt rounded domes of milky white gel, then top with pearl chrome powder.
Texture Focus: Lustrous surface + light bounce.
3. Velvet Ribbon Accents
Use velvet matte topcoat over raised ribbon shapes to create the illusion of fabric.
Texture Focus: Plush dimension + soft shadow play.
4. Gem Cluster Almond Tips
A deep burgundy almond nail with clustered gems and 3D metallic framing.
Texture Focus: Reflective stones + sculpted metallic edges.
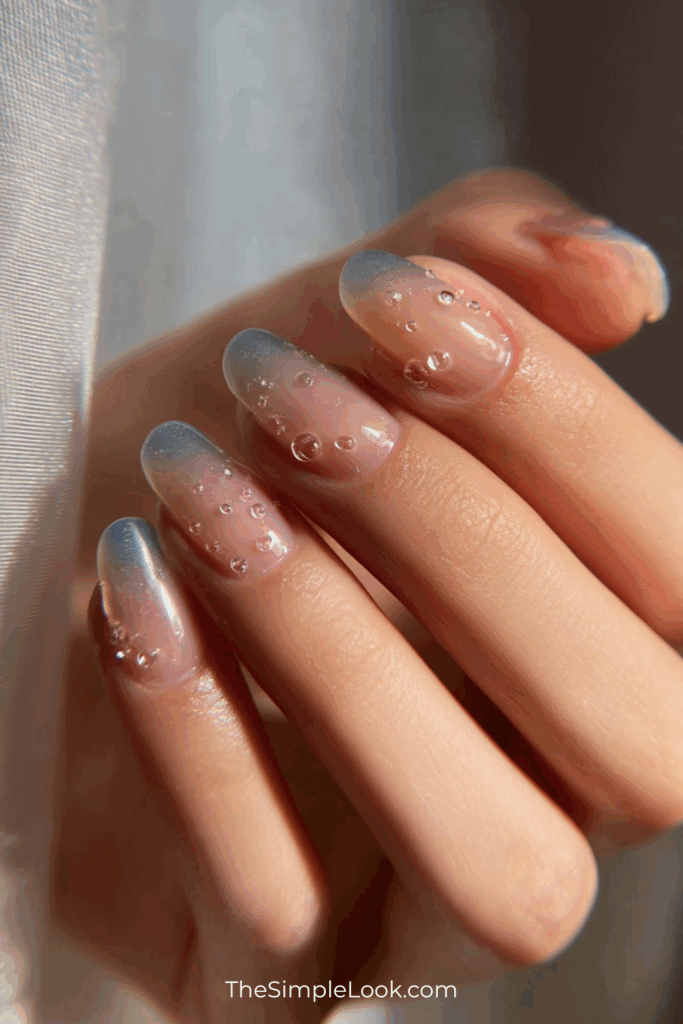
5. Luminous Dew Drop Nails
Mimic raindrops with clear domes of hard gel over pastel gradients.
Texture Focus: Liquid realism + gradient glow.
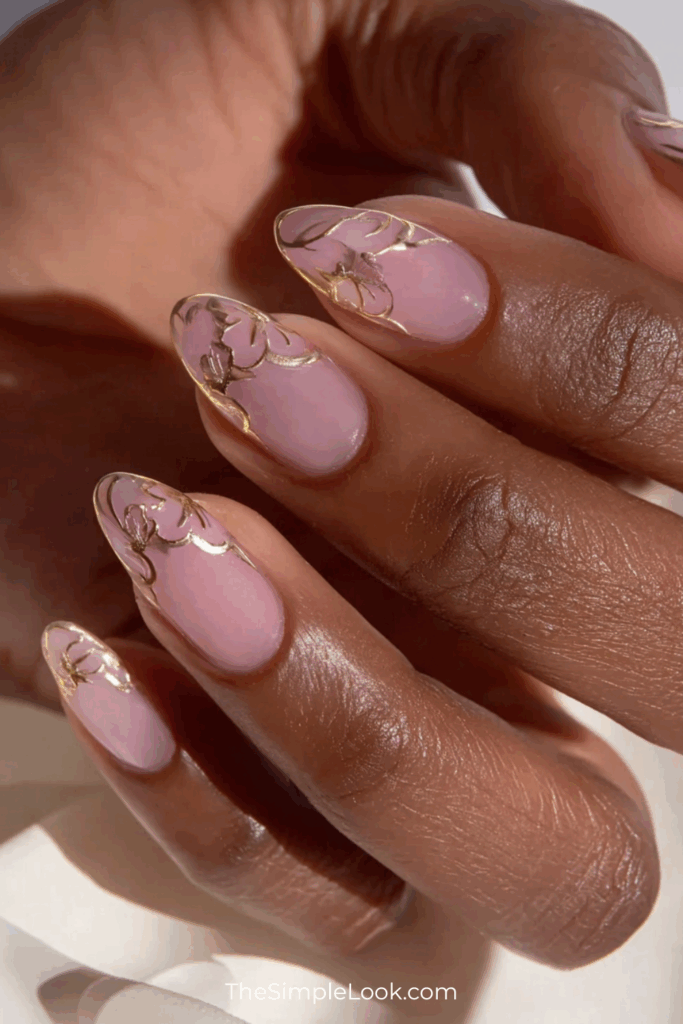
6. Chrome Outlines on Nude
Outline a French tip with fine silver chrome lines for a minimalist 3D dimension.
Texture Focus: Precision + reflective edge.
7. Pressed Floral Layers
Embed dried micro-flowers within translucent layers of sculpting gel for preserved realism.
Texture Focus: Depth illusion + nature aesthetic.
Pro-Level Texture Secrets
- Mix Gloss and Matte Finishes
Layering both gives your nails a camera-ready contrast. Gloss reflects light, matte absorbs it — creating a natural play of depth. - Use Color in Layers, Not Blocks
Instead of painting thick color, use thin tinted gels in layers for gradual depth. Think of it as digital “airbrushing” for nails. - Strategic Lighting Matters
When you photograph your 3D nails for Pinterest or Instagram, diffuse lighting from one side enhances the sculptural shadows. - Tiny Imperfections Add Realism
Slight texture inconsistencies make designs feel organic, not plastic. Hyper-realistic art thrives on natural irregularities.
Maintenance Tips for 3D Nail Designs
3D nails are slightly higher maintenance — but worth it for the dimension they bring.
- Avoid heavy pressure on tips or corners.
- Re-topcoat every 5–7 days for shine and protection.
- Use a cuticle oil daily to keep the surrounding skin hydrated.
- For removal, never file the 3D pieces aggressively — soak off with patience.
Final Thoughts: Texture Is the New Luxury
In 2026, nails are no longer just about color — they’re about feel.
The new wave of hyper-realistic 3D nail art celebrates depth, light, and form, offering wearable art that looks stunning both in person and on camera.
Whether you start with a single sculpted accent nail or build full-dimensional sets, remember: it’s all about subtle realism.
With the right gels, tools, and patience, you can achieve salon-level 3D textures right from home.
Let your creativity (and your top coat) shine — one dimension at a time.